Showing posts with label wafer paper. Show all posts

Thursday, January 26, 2017

Valentine's Day Roundup


Pink. ðŸ’—  Red. ðŸ’” White. Red & Turquoise.   Hearts. 💜💜💜 

Seen any of these lately?  Just kidding. Do you live in a cave? 

Valentine's Day is just around the corner. Again. Sorry.
Did I make your heart pound a little faster? Count it as cardio!
Right after you finish those ahem, "test" chocolates.

Here are a few sweet ideas from some past projects . . .


and just in case you missed the link to make your own roses:


Has Cupid's arrow hit any of your body parts yet? Better get to baking for your sweetest someone!

xoxo,
Deborah


Wednesday, April 20, 2016

Surprise Inside Spring Butterfly Flight Cake

surprise-inside-butterfly-cake-edible-moss-wafer-paper-deborah-stauch
Happy SPRING!!! These guys flew into my mind a while back . . . 

surprise-inside-butterfly-cake-edible-moss-wafer-paper-deborah-stauch
. . . and eventually ended up landing inside this moist and creamy white chocolate and cream cheese cake.

inspiration-surprise-inside-butterfly-cake-edible-moss-wafer-paper-deborah-stauch
Sorry to say that I didn't save the source and can't read the watermark. So unfortunately I'm unable to link to the creator of this beauty.
The exterior was going to be white like the inspiration photo. And the colors were going to be all soft and pretty.


surprise-inside-butterfly-cake-edible-moss-wafer-paper-deborah-stauch
But then I got moss in my hair and on my brain and this is what really happened. The outside was SO simple! Moss colored cake crumbs and wafer paper butterflies.  


surprise-inside-butterfly-cake-edible-moss-wafer-paper-deborah-stauch
The colors are a bit brighter than I'd hoped for. One day I'll learn. Hopefully. Hope YOU are enjoying warmer days and bright butterfly sightings where ever you are!

If you want to see my very 1st attempt at butterflies . . . 

xoxo,
Deborah


Friday, January 29, 2016

Surprise Inside Mini Cupid Cakes

valentine's-day-cake-surprise-inside-cupid-wafer-paper-arrow-heart-crumbs-deborah-stauch
Stupid Cupid? Lover Boy? Angel of Love? Whatever you call him, he's around every corner this time of year! He was most recently spotted lurking inside these mini heart shaped cakes.  

valentine's-day-cake-surprise-inside-cupid-wafer-paper-arrow-heart-crumbs-deborah-stauch
These cute little cupids were made from dark chocolate cake  and surrounded by a moist delicious red velvet cake loaded with chopped maraschino cherries.  

The hearts were slathered with a generous layer of ganache, set on their sides and finished in four different textures.

valentine's-day-cake-surprise-inside-cupid-wafer-paper-arrow-heart-crumbs-deborah-stauch

valentine's-day-cake-surprise-inside-cupid-wafer-paper-arrow-heart-crumbs-deborah-stauch
Couldn't make up my mind between the rustic ganache, cake crumbs, sparkling red sugar or tiny nonpareils. None of the finishes were meant to look perfect since no one's heart remains unscathed after yearly brushes with this little fat man's arrows. No fear this year! In this case they are completely harmless and entirely edible!

valentine's-day-cake-surprise-inside-cupid-wafer-paper-arrow-heart-crumbs-deborah-stauchChocolate covered Pocky cookie sticks prevented the arrows from drinking up any moisture from the cake. The arrow end is made from a cherry flavored gummy heart and the opposite end was cut from wafer paper before dry brushing all of the arrow parts with edible silver luster dust. These would make a cute party snack on their own but I heart the way they look when shot thru the cake. Yes. I said I heart. It's the season. Deal with it. Cards, balloons, flowers, candy. What's not to heart?


hugs,
Deborah


Sunday, July 8, 2012

Surprise Inside Cake - Hidden Butterflies


UPDATE: See the improved and SO MUCH BETTER version here!!!

surprise-inside-cake-butterflies-free-tutorial-deborah-stauch


Look what landed inside this cake!  BUTTERFLIES!!! 
They're all over my kitchen right now but that's okay. They're happy butterflies. Not the Silence of the Lambs kind.

surprise-inside-cake-butterflies-free-tutorial-deborah-stauchThe butterflies were a bit more fragile than the stars so I wanted to be sure the points didn't break off during assembly. The thin partially baked cake layer was perfect for holding the cookies in place while the ring was stacked.

These are the same butterflies that I told you about in my previous post/tutorial for the Hidden Stars or Let Freedom Ring CakeThe method is mostly the same with the following exceptions:

The cookie shapes were baked for 4 minutes at 350F and left to cool on the baking sheets. I sandwiched some baked/raw in a couple of the rings before I decided to try trimming the cookies in like in the photo below instead.
surprise-inside-cake-butterflies-free-tutorial-deborah-stauch
My husband thought the shapes in the ring needed beveling, instead of smishing the raw cookies to eliminate the gaps at the outer edge. So I baked the remaining raw cookies and a beveling is what they got. By me. Funny that he was now where to be found when the actual beveling occurred.
I think I prefer this over the raw/baked sandwich method but don't tell him. He'll probably want royalties. : )

surprise-inside-cake-butterflies-free-tutorial-deborah-stauch


I also made one cake mix per directions on the box. I poured a small amount into the bottoms of (2) 9 inch rounds, (1) 6 inch round and (2) four inch rounds. I didn't want the batter to go to waste since it wouldn't hold long enough for me to stack the rings. The pans were only baked about 10 minutes or long enough for the batter to slightly set up.


surprise-inside-cake-butterflies-free-tutorial-deborah-stauch
This is the first pan I prepared. I meant to stack the butterflies upside down but completely forgot about it until the pan was almost done. No worries. It came out fine but I just had to make sure the layer was assembled correctly when it came time to stack the cake. Good as reason as any for cutting inside and taking a quick peak before the layers were frosted.

surprise-inside-cake-butterflies-free-tutorial-deborah-stauch
The second pan shows my DIY cake ring made from ribbed shelf liner and large paper clips. It holds the ring in shape and can stay in the pan until after the batter is poured in if you like. Just lift it up and give it a good wash and you're ready for the next project. Cheap alternative to cake rings and it stores flat in the bargain.


Both of the 9 inch pans above had the raw/sandwich method.
They're okay but the beveling method with no raw cookies is a bit neater.

surprise-inside-cake-butterflies-free-tutorial-deborah-stauch
See what I mean? This is the six inch pan. The "cake rings" are cookie cutters. Thought I'd show you this option just in case you already have these cutters and don't want to go buy shelf liner and make your own.


surprise-inside-cake-butterflies-free-tutorial-deborah-stauch
I pulled out the 2 cutters I used from my set so you can get an idea of what set I'm talking about. The labels are long gone so I have no way to know the manufacturer or source but there are lots of circle sets out there for you to choose from.


surprise-inside-cake-butterflies-free-tutorial-deborah-stauch
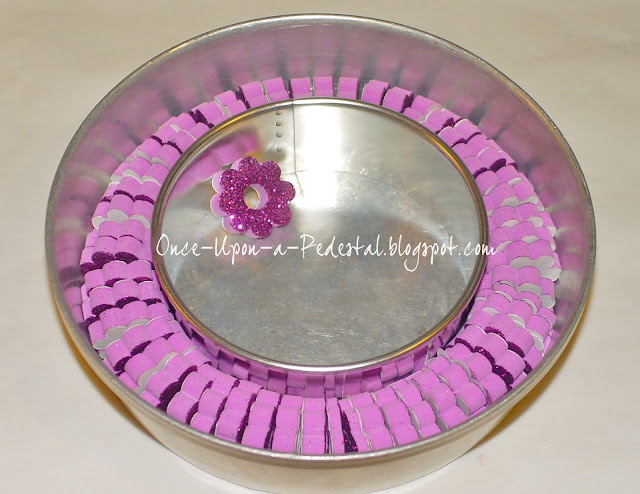
This is how I originally tried to figure out about how many cookies it would take to fill a ring. These little foam shapes are available at most craft stores and are about the same thickness as the cookies. I'm one of those people that need to see it  rather than imagine it. All sorts of bad things can happen if I just imagine.

surprise-inside-cake-butterflies-free-tutorial-deborah-stauch
It's important to plan a bit for this type of cake and make sure your cookies fit the pans you plan to bake them in. Placing the cutters in the pan before hand helps visualize the placement needed before you go poking them into the batter.

surprise-inside-cake-butterflies-free-tutorial-deborah-stauch
Another shot of planning with the other 2 butterfly cutters I used here. Note that the DIY ring is sized slightly smaller than the 9 in ring.
You'll want to leave a little batter on the outside of the cake so that your shapes don't start poking out the sides and fall apart when you go to frost the cake.


surprise-inside-cake-butterflies-free-tutorial-deborah-stauch
Once the rings were assembled in the pans, I mixed up another cake mix and covered the butterflies. It would have been nice to have a little more batter for the (2) 9 inch rounds so you may want to keep that in mind.
The cookies still baked up inside but you could see a tiny bit of white when they were baked at the top of the pan. A little more cushioning and even spacing in the layer would've been even better.

surprise-inside-cake-butterflies-wafer-paper-free-tutorial-deborah-stauch
The layers were filled and iced with ganache from purple candy melts the same color as the batter so as not to detract from the impact.
The outside was covered with green ganache and given a brushed finish.
The butterflies are punched from wafer paper using mostly Martha Stewart punches.
My original plan was to use the butterfly background I'd made the day before with the same punches (plus a few others) and some textured paper.
It seemed a little busy in the end so I opted for a background where you might actually see the wafer paper butterflies on the cake. 
They are attached to wafer paper dandelions on cellophane noodle "stems" so they are food safe.
I love using them for all kinds of cake decorations but the clear and airy look was just about perfect for this.


surprise-inside-cake-butterflies-wafer-paper-free-tutorial-deborah-stauch
The ganache made for a nice clean cut and the cookies weren't at all hard to slice through. Just be sure to only bake them for 4 minutes before assembling the ring and you're safe.

surprise-inside-cake-butterflies-wafer-paper-free-tutorial-deborah-stauch
Grab your fork and dig in!

Thanks for looking!


UPDATE:

You can find the cookie recipe here.


Friday, February 10, 2012

Heart Wreath from Cupcakes and White Wafer Paper Roses


Look Ma! No carving! This wreath was made using mini cupcakes.

Here they are. Pretty in pink. All lined up and ready to go.

Twenty six little bundles of joy before the frosting.
The cupcakes were attached to the fondant covered
foam core heart with a dollop of butter cream.
Then all of the nooks and crannies were filled.
A final layer of frosting was slathered over the
 these pink beauties before covering them with fondant.
Kind of hated to hide them but won't they be a lovely surprise?

Here's a close up of some of the 60 wafer paper roses that adorned the heart.
They were SO easy to make and went rather quickly.
They also are as light as a feather and melt in your mouth.
Not in your hands. Unless your hands are wet.

Happy Valentine's Day and thanks for stopping by!

(Tutorial can be found in the next post.)